In GIZZVA, there are user levels with their own features and privileges that you can use depending on your needs. To upgrade to each level, you need to go through steps, including authentication.
The reason for authentication is encryption rules and preventing misuse of your identity.
The higher the user level, the more features you can use.
Step 1: Login to your account and verify your identity.
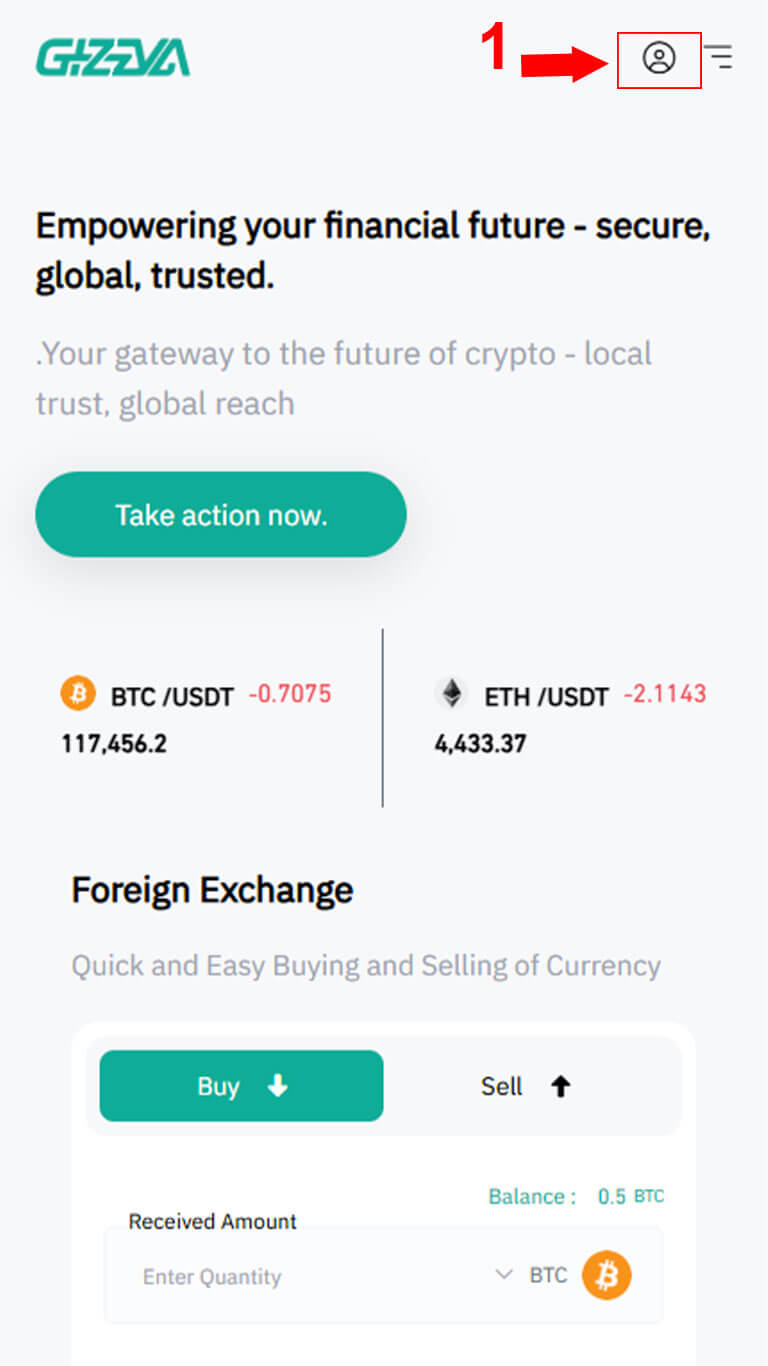
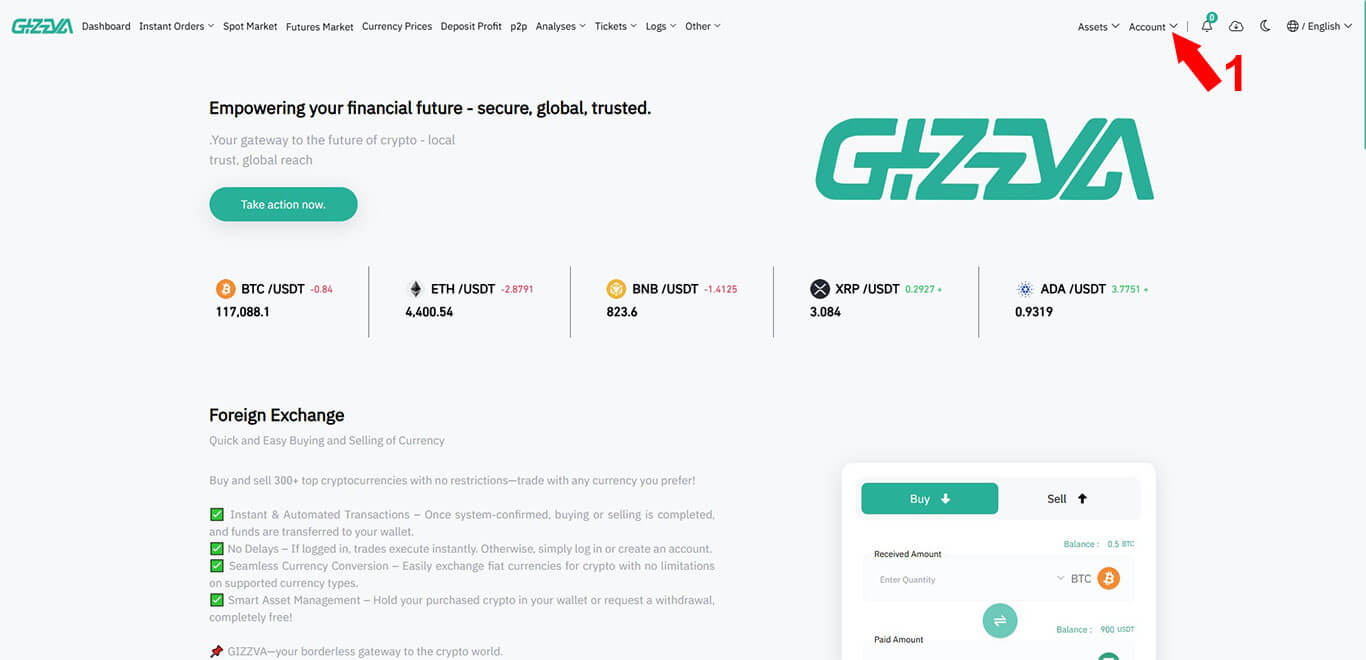
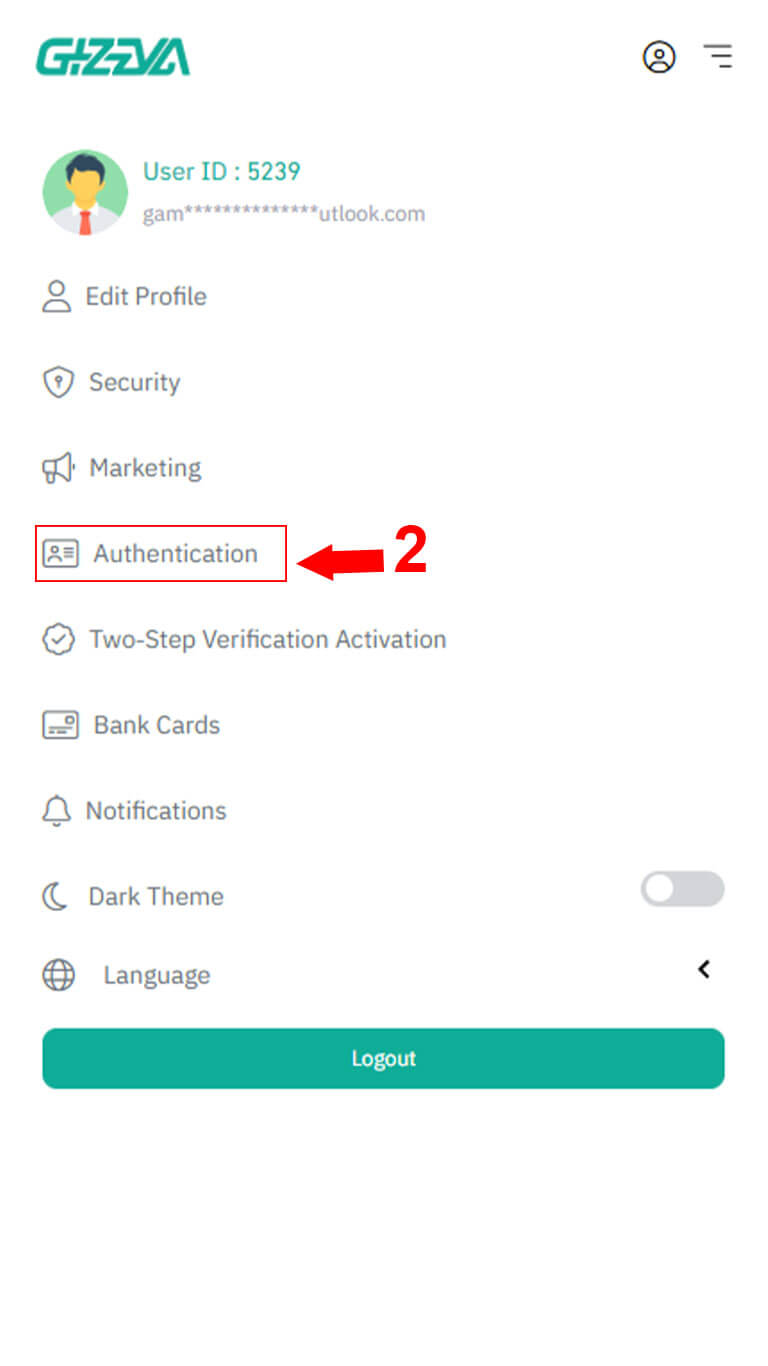
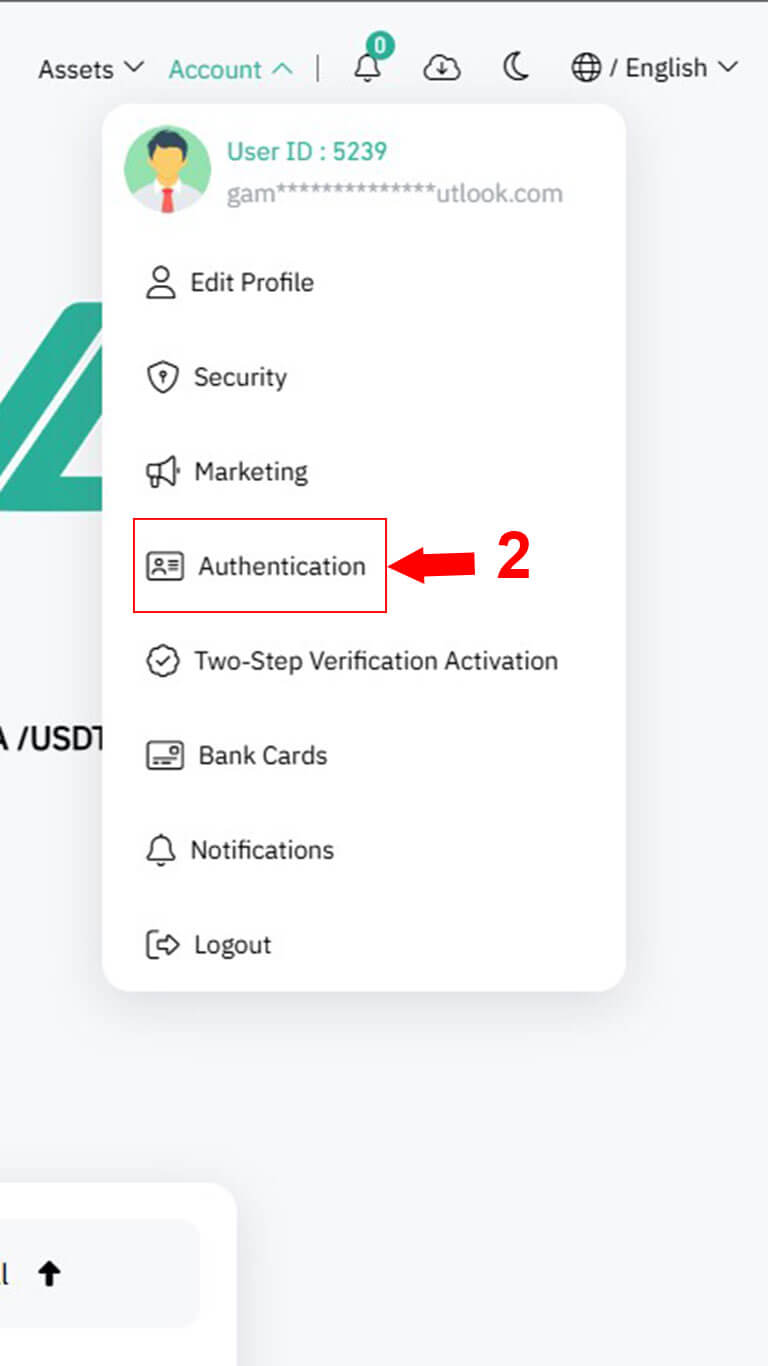
To authenticate, on the website, you can click on the “Authentication” option at the top of the dashboard after logging in to your account. In the app, simply go to the Authentication section from the main page or from the menu option in the sidebar. (Numbers 1 and 2, respectively, as shown in the images below)
Step 2: Personal Information
Complete the personal information form that has been opened for you carefully. The information in this form includes the following:
2. Name: Enter your name.
3. Last name: Enter your last name.
4. Father’s name: Enter your father’s name.
5. Mobile number: Enter your mobile number.
6. National ID or passport number: Enter your national ID or passport number.
7. Landline number: Enter your landline number. If the landline number is not available, you can re-enter your mobile number from the same mobile number.
8. Gender: Select your gender in this section.
9. Date of birth: Enter your date of birth in this section.
After completing the personal information form, click on the Next button (number 10 in the image below). Normally, it takes between a few minutes and up to 1 day for this section to be approved by the system.

Step 3: Location Details
After the system has verified your personal information, re-enter the account authentication section. Now the form related to your location details has opened, fill it out carefully. The information in this form includes the following:
11. Country: Enter your country of residence. (Your country of residence determines the local currency of your account. )
12. Province or State: Enter your province or state of residence.
13. City: Enter the name of your city of residence.
14. Zip Code: Enter your zip code.
15. Address: Enter your address.
After completing the location details form, click the next button (number 16 in the image below). Normally, it takes between a few and a maximum of 1 day for this section to be confirmed by the system.

Step Four: Identity Card
After the system confirms your location information, log in to your account authentication section again. Now the form related to the identity card has opened, fill it out carefully. The information in this form includes the following:
17. Upload an image of your national card, identity card, driver’s license, or passport: In this section, upload an image of your national card, identity card, driver’s license, or passport. Be careful that the image should not be scanned with a scanner and must be taken with a mobile camera. Be careful that the image of the identification documents you upload does not have any shadows and that its information is clearly visible. Images of identification documents scanned with a scanner are not acceptable.
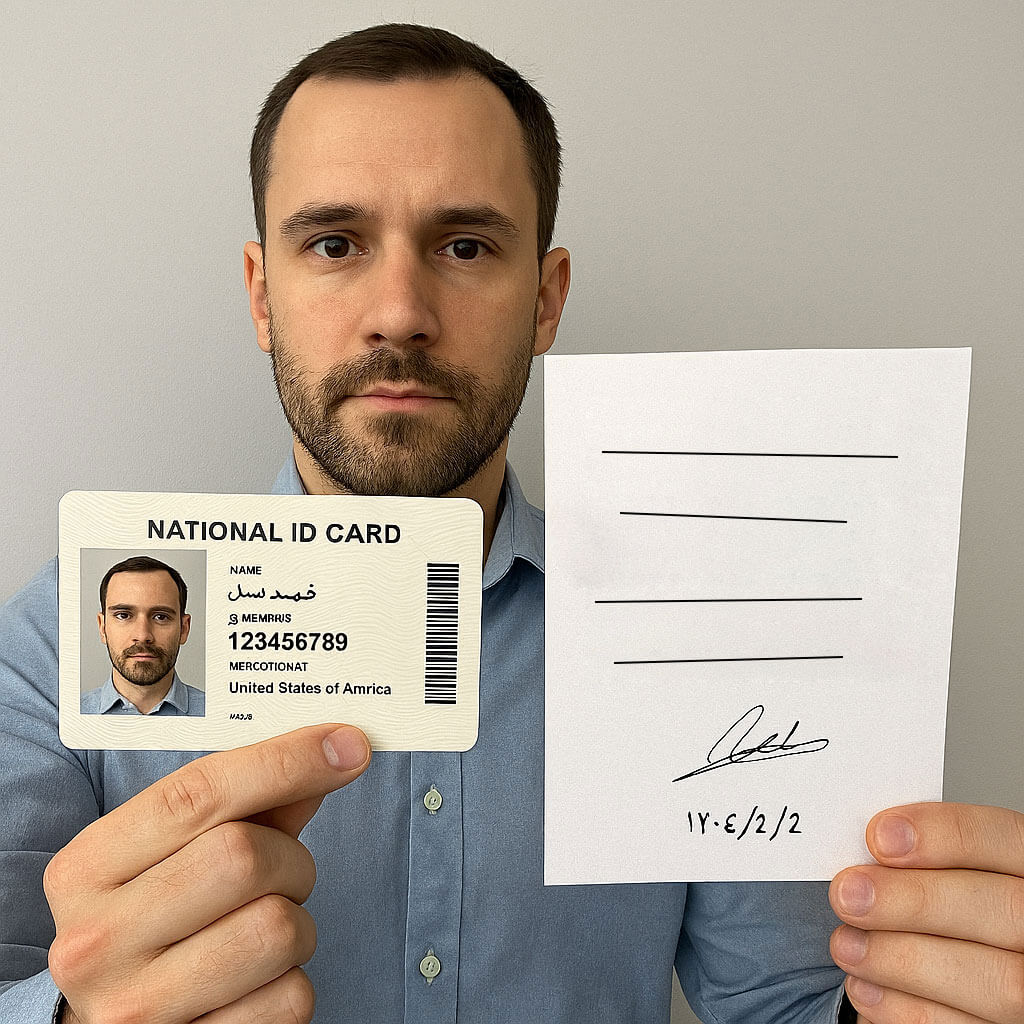
18. Commitment letter: In this section, you can choose one of the methods of sending the commitment letter in the form of a photo or video. And fill in its information carefully. In this section, you need to prepare a white sheet and write the text of the commitment letter clearly and legibly on that white sheet by selecting one of the two options “Send the commitment letter as a video” or “Send the commitment letter as a photo” in the red box.

Send the commitment letter as a video: If you choose this option, prepare the white sheet on which you have written the commitment letter along with your identification document next to you. Then click on the Start recording video button. By clicking this button, your browser or application may ask you for permission to access the camera. Confirm it so that the use of your mobile camera or PC webcam is provided for recording the video. Then hold your identification document along with the commitment letter sheet next to your face in a way that your face, your identification document information, and the text of the commitment letter are clearly visible in the image being recorded.
After you are sure that the recording is done correctly, click on the Stop recording button. And check your video in the preview section. If there were no problems with recording the video, click on the Confirm and send video button.
Send the commitment letter to the photo: If you choose this option. Hold the white sheet on which you have written the commitment letter along with your identification document next to your face as shown in the sample image. Be careful that the image taken must be completely clear and the information in the commitment letter text on the sheet and your identification document next to your face must be completely legible and clear. And take a selfie of yourself like the sample image below and upload it to the commitment letter image upload section.
After completing the ID card form, click on the next button (number 19 in the image below). Normally, it takes between a few to a maximum of 1 day for this section to be approved by the system.
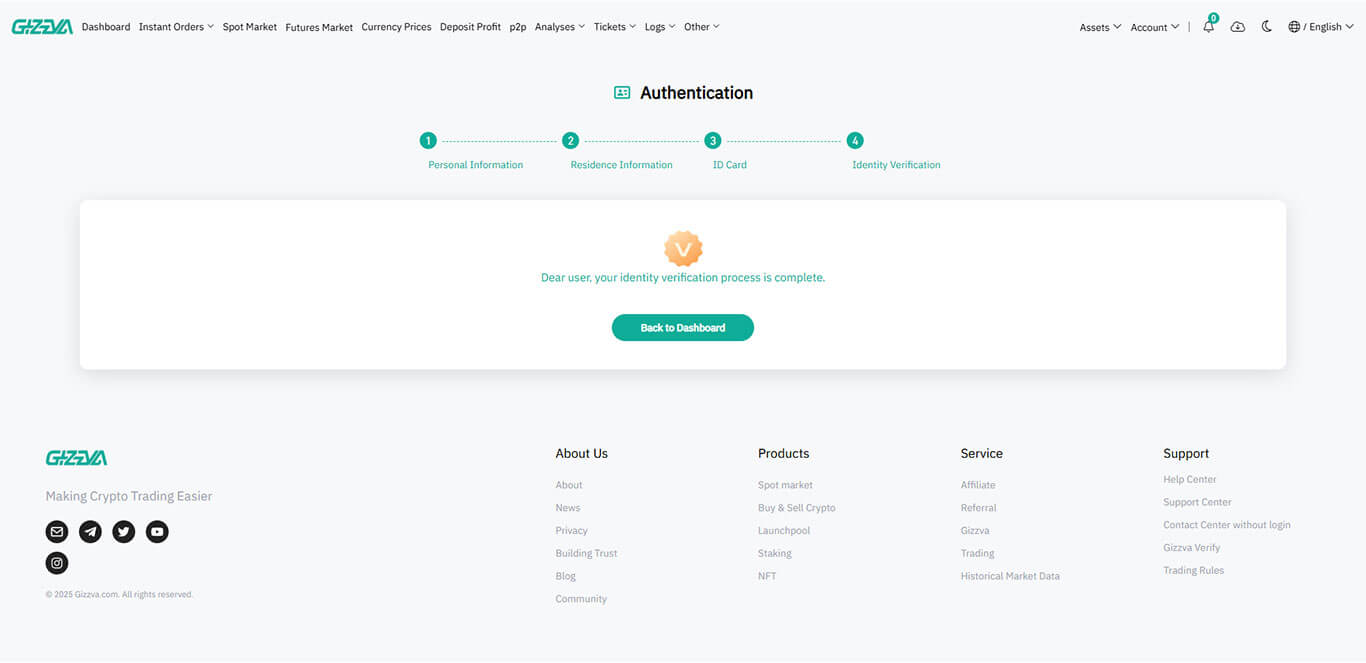
Step 5: Verify your authentication information
After the system has verified your identification information, log in to your account authentication section again. If you see the image below, congratulations, you have completed your authentication and are now at level 3. Good luck.